Choose a wall by use, not just spare width
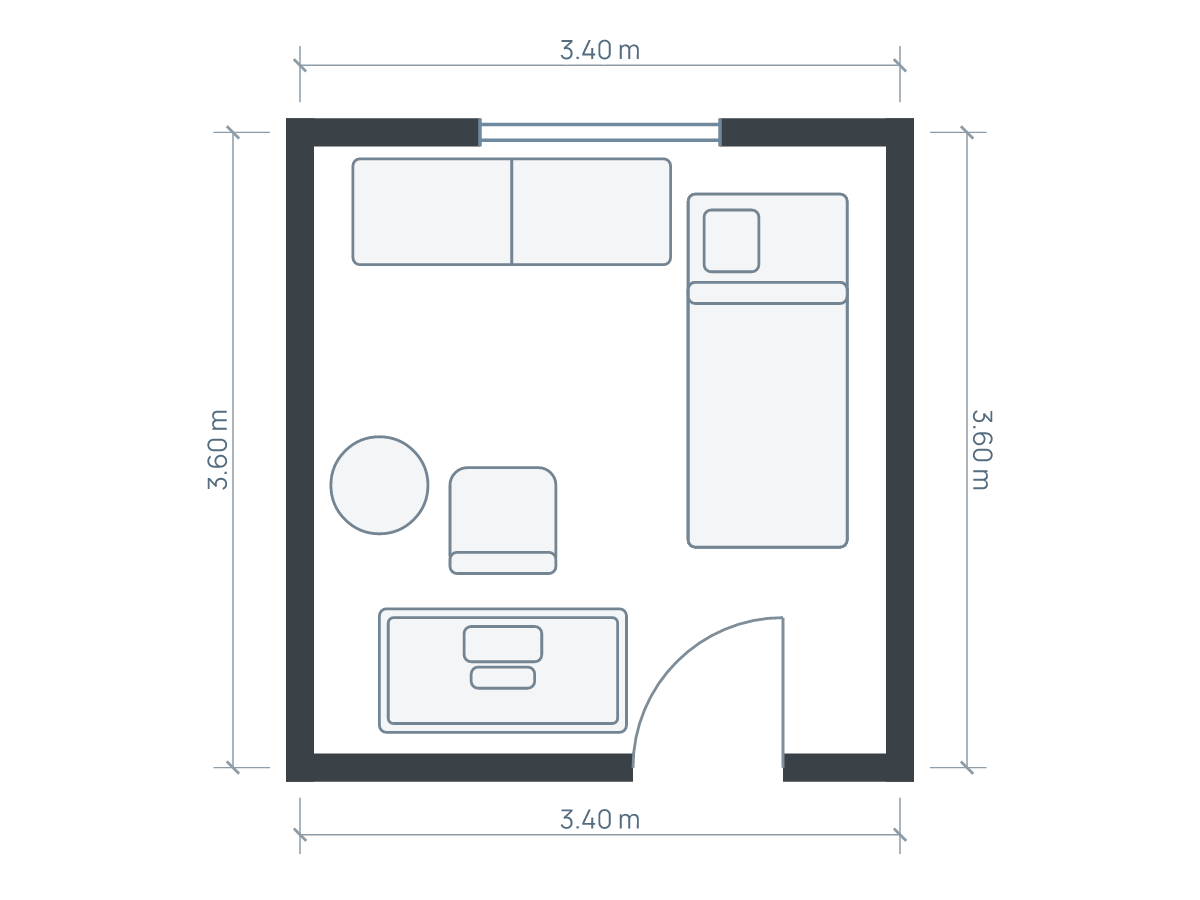
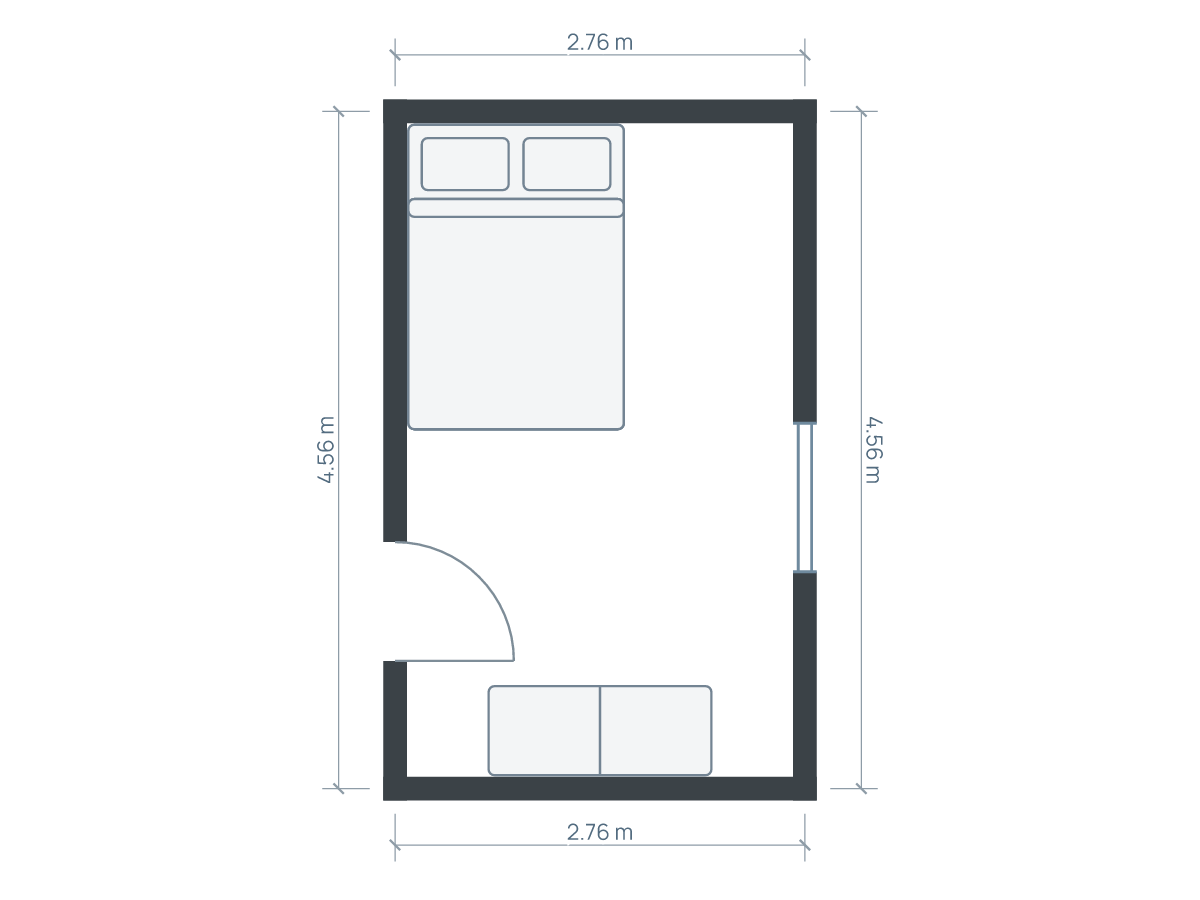
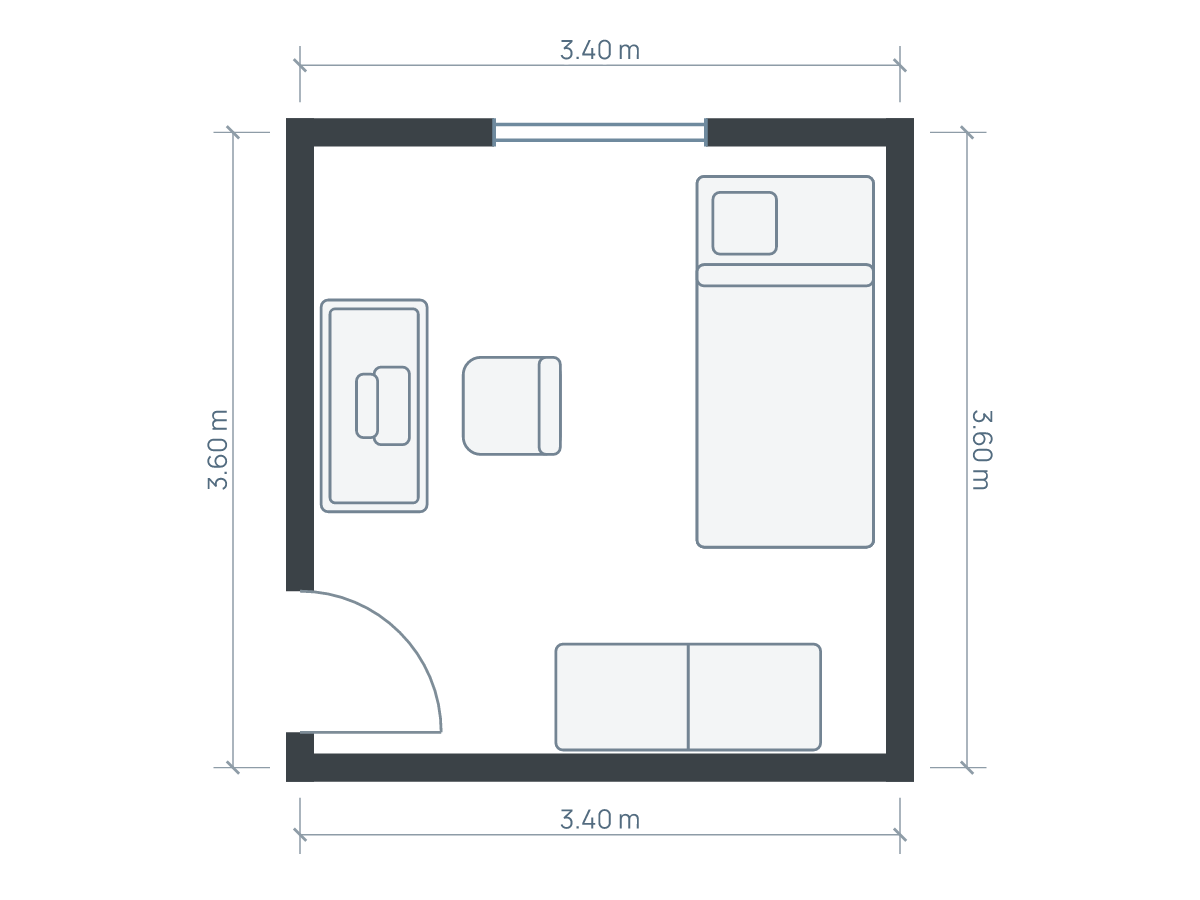
Put a wardrobe on the wall that can accommodate its full depth, its open doors or drawers, and the person using it without blocking the bedroom’s essential route. An end wall often protects the space beside the bed; a side wall can work if the room is wide enough. A door-side recess is useful only when the entry swing and access remain clear.
Draw all three candidates before choosing. The longest empty wall is not automatically the best one: the wardrobe may face the bed at a pinch point or cover a window, socket, radiator control or other feature that needs access.
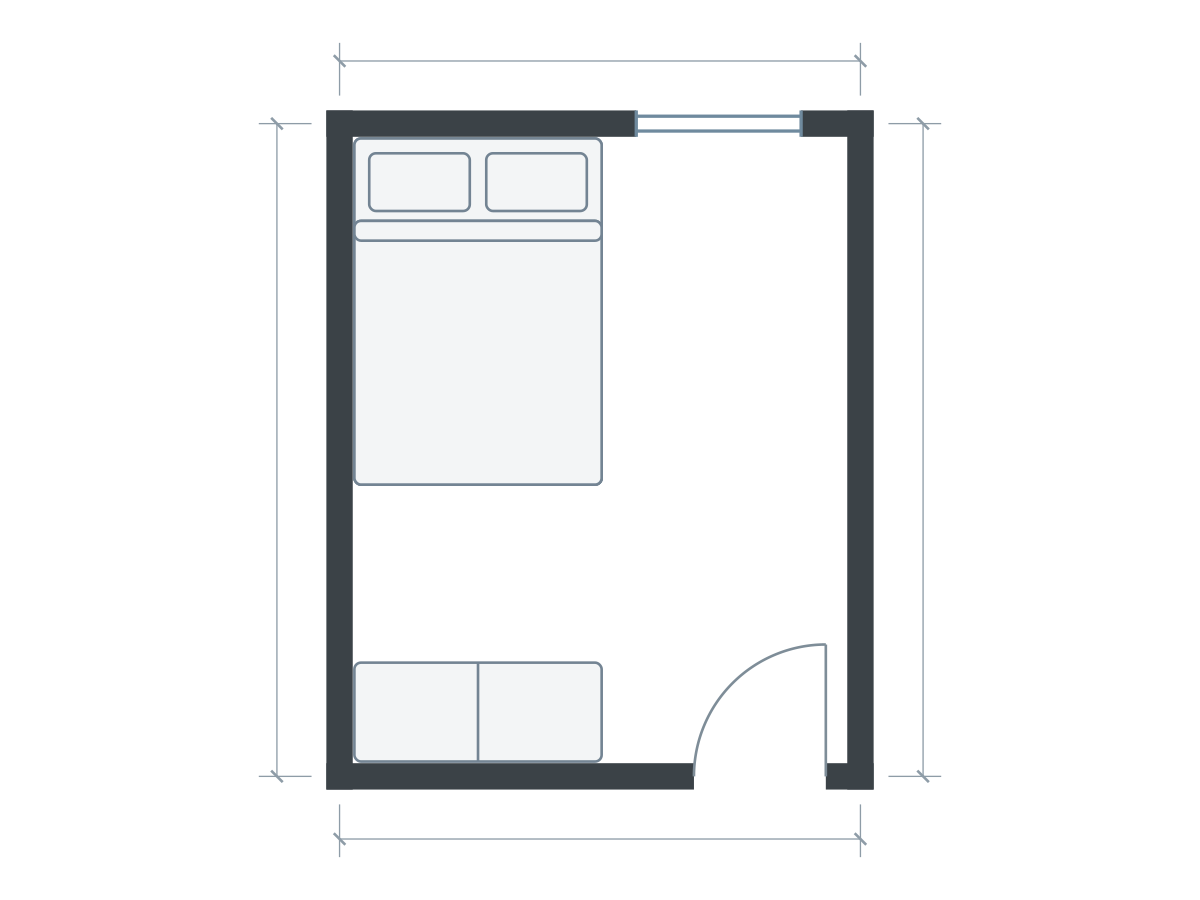
Furniture sizes in this drawing
| Piece | Meters | Feet |
|---|---|---|
| Double bed | 1.50 × 2.10 | 4.92 × 6.89 |
| Wardrobe | 1.50 × 0.60 | 4.92 × 1.97 |
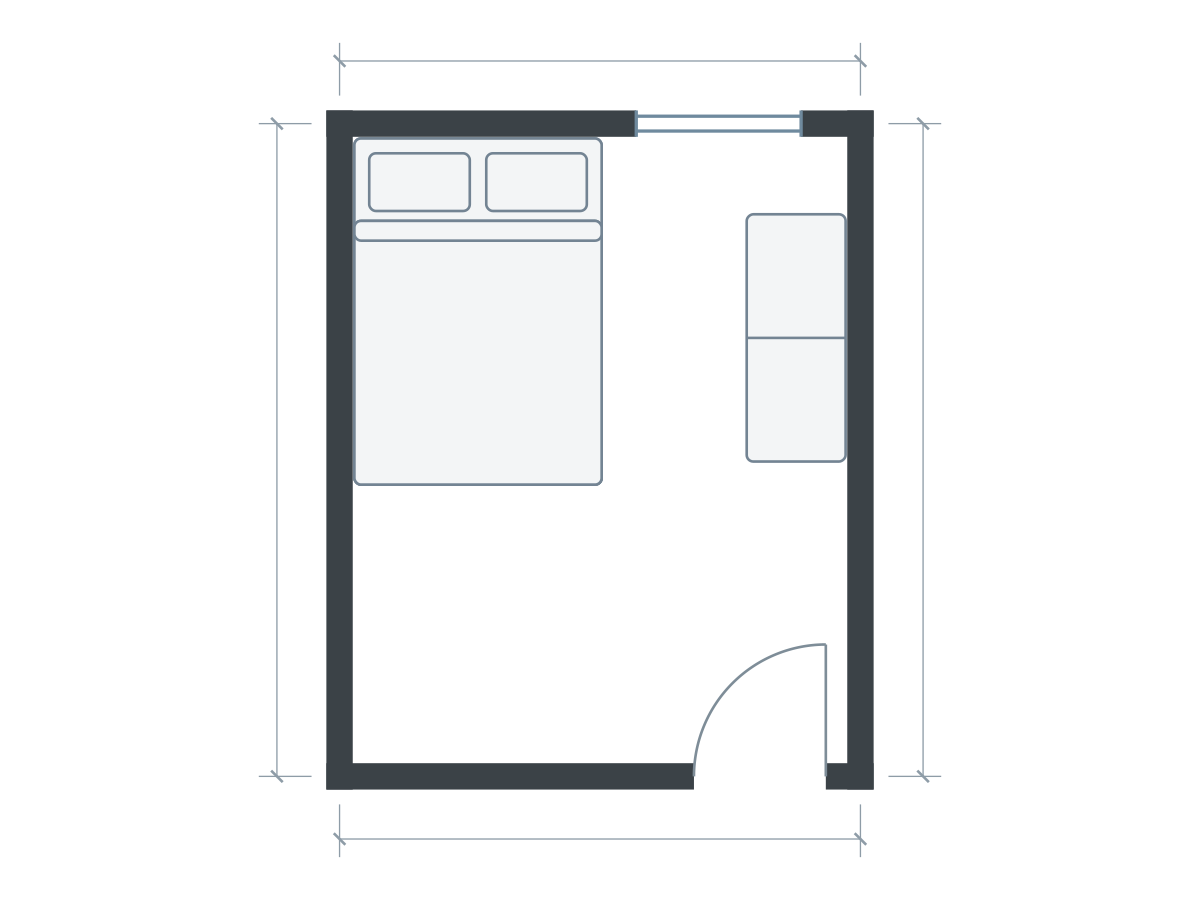
Furniture sizes in this drawing
| Piece | Meters | Feet |
|---|---|---|
| Double bed | 1.50 × 2.10 | 4.92 × 6.89 |
| Wardrobe | 1.50 × 0.60 | 4.92 × 1.97 |
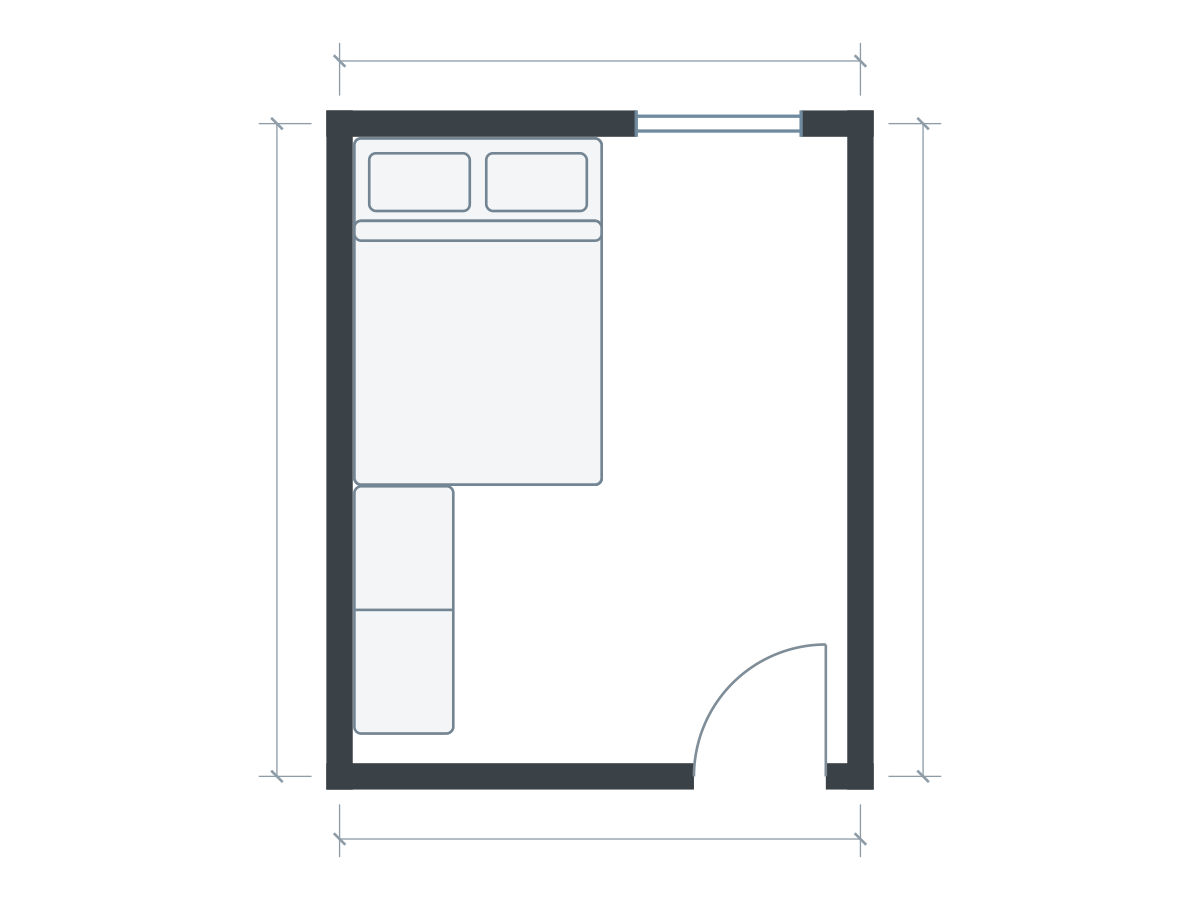
Furniture sizes in this drawing
| Piece | Meters | Feet |
|---|---|---|
| Double bed | 1.50 × 2.10 | 4.92 × 6.89 |
| Wardrobe | 1.50 × 0.60 | 4.92 × 1.97 |
The alternatives use the same room outline and drawing scale. Open each to inspect and save an independent editable copy. Illustrations show footprints; drawer travel, vertical clearances and continuous walking routes need separate checks.
Calculate the closed gap, then spend it carefully
Take an illustrative finished clear room 3.00 × 3.80 m (9.84 × 12.47 ft), a bed frame 1.50 × 2.10 m (4.92 × 6.89 ft), and a wardrobe 1.50 m wide by 0.60 m deep (4.92 × 1.97 ft). With the bed to one side and storage directly opposite, the across-room gap is 3.00 − 1.50 − 0.60 = 0.90 m (2.95 ft).
That is the gap between closed footprints. Suppose the selected hinged door projects 0.50 m (1.64 ft) when open. It leaves only 0.40 m (1.31 ft) beyond the door’s outer edge in the simplified straight-line calculation. It may be awkward to stand and reach even though the wardrobe rectangle fits. Check the actual hinge motion and interior drawers, not this assumed projection.
Move the wardrobe to the bed’s foot end and the corresponding gap is 3.80 − 2.10 − 0.60 = 1.10 m (3.61 ft). This gains 0.20 m (0.66 ft) in this example, but only if no doorway or projecting wall occupies that area. The numbers are a comparison, not a universal allowance.
Test three candidate positions
At the foot of the bed: clothing storage forms a dressing end to the room. It can avoid narrowing the bed-side route, but may leave little space for drawers or a bench. Keep the room entrance out of the opening zone.
Along the side wall: storage is close to the bed, and a longer run may be possible. Its depth is taken from the same width needed for bed access. Check the narrowest section, including projecting handles, rather than the average gap.
Beside the entrance: a short wall may keep the main bed area open. Measure the open room door and the return to the corner. A wardrobe immediately behind the door can prevent the door opening fully or conceal a switch. Draw both moving leaves at their real sizes.
Sliding doors solve one problem, not every problem
Sliding doors remove a hinged leaf from the aisle, which may help in a narrow gap. You still need space to stand, move clothing and open any interior drawers. A sliding system may also expose only part of the wardrobe at a time. Open storage avoids a moving door but leaves contents visible and still needs reaching space.
A shallower cabinet changes the width budget more directly, but may not suit the same hangers, rails or clothing. Evaluate the internal specification before replacing a deep unit with a shallow outline. The most useful storage is the unit that can hold and release what you use.
Check height, assembly and fixing before ordering
A floor-plan footprint cannot show whether a tall unit can be built or raised into position. Measure ceiling height, slopes, coving and the delivery route. IKEA’s PAX clearance guide distinguishes assembly methods and door types; use the exact current instructions for the chosen product. Do not transfer one model’s ceiling allowance to another.
Follow the product’s wall-fixing instructions. IKEA’s wall-anchoring guidance calls for the supplied restraint and appropriate hardware for the wall type. In a rental, resolve fixing arrangements with the landlord rather than simply leaving required restraints out.
Make a storage decision you can test
- Measure the full unit, including doors, trims and handles.
- Record the real door swing and drawer extension.
- Mark a standing position in front of the open unit.
- Walk from the entry to the bed and window.
- Check assembly height, fixing and delivery access.
The bedroom-and-desk study provides an editable starting point, but its wardrobe and window relationship needs your own vertical checks. Save a version for each candidate wall and compare. Planlilt uses centerline wall measurements and top-down fit checks; neither certifies accessibility, construction suitability, vertical clearance or every route.
Sources and editorial approach
Published by Planlilt. Worked dimensions and layout choices are illustrative assumptions unless a source is identified beside a claim. Feet use 1 ft = 0.3048 m and are rounded decimal equivalents. No search-volume estimates or professional certification are implied.
- IKEA PAX ceiling-height and assembly guide — Wardrobe assembly clearance can exceed finished unit height and depends on frame, doors and assembly method; follow the exact product instructions.
- IKEA Secure it: furniture wall anchoring — Use the supplied restraint and hardware suitable for the wall, following the furniture instructions.
Original Planlilt geometry; illustrative 2D plan, not a photograph or 3D render.