Compare the whole set, not an isolated desk
For a small bedroom with a desk, test three orientations before buying a smaller worktop: the bed along one side with a desk opposite, the bed across the far end with the desk on a side wall, and the bed on the other side with a desk at the foot end. Keep every footprint unchanged and compare where the occupied chair, wardrobe access and entry route compete.
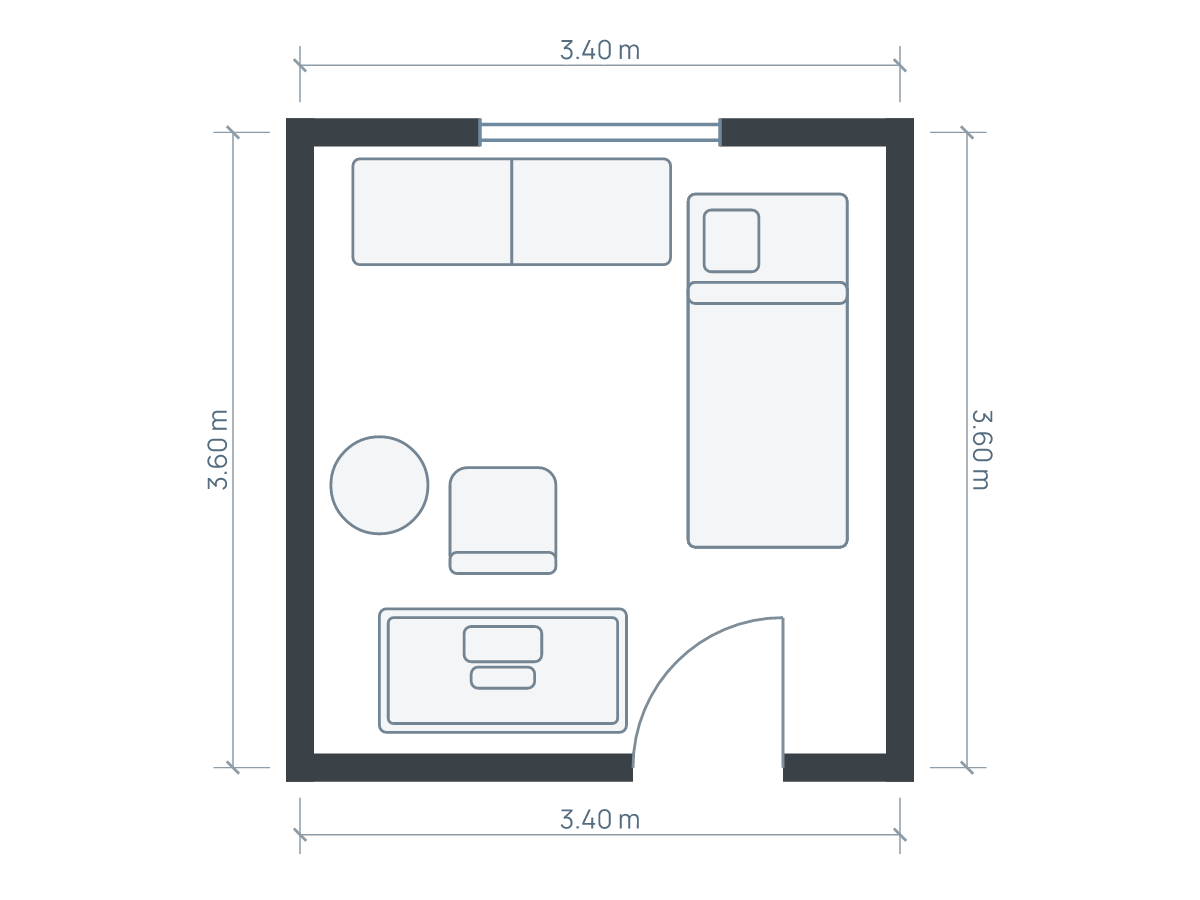
The drawings use one illustrative 3.40 × 3.60 m room (11.15 × 11.81 ft) at the same scale. The entry is near the lower end of the left wall; the window is on the top wall. These positions are assumptions, not a model for every bedroom. Wall dimensions follow Planlilt centerlines, so the clear interior is smaller by the wall-face offsets.
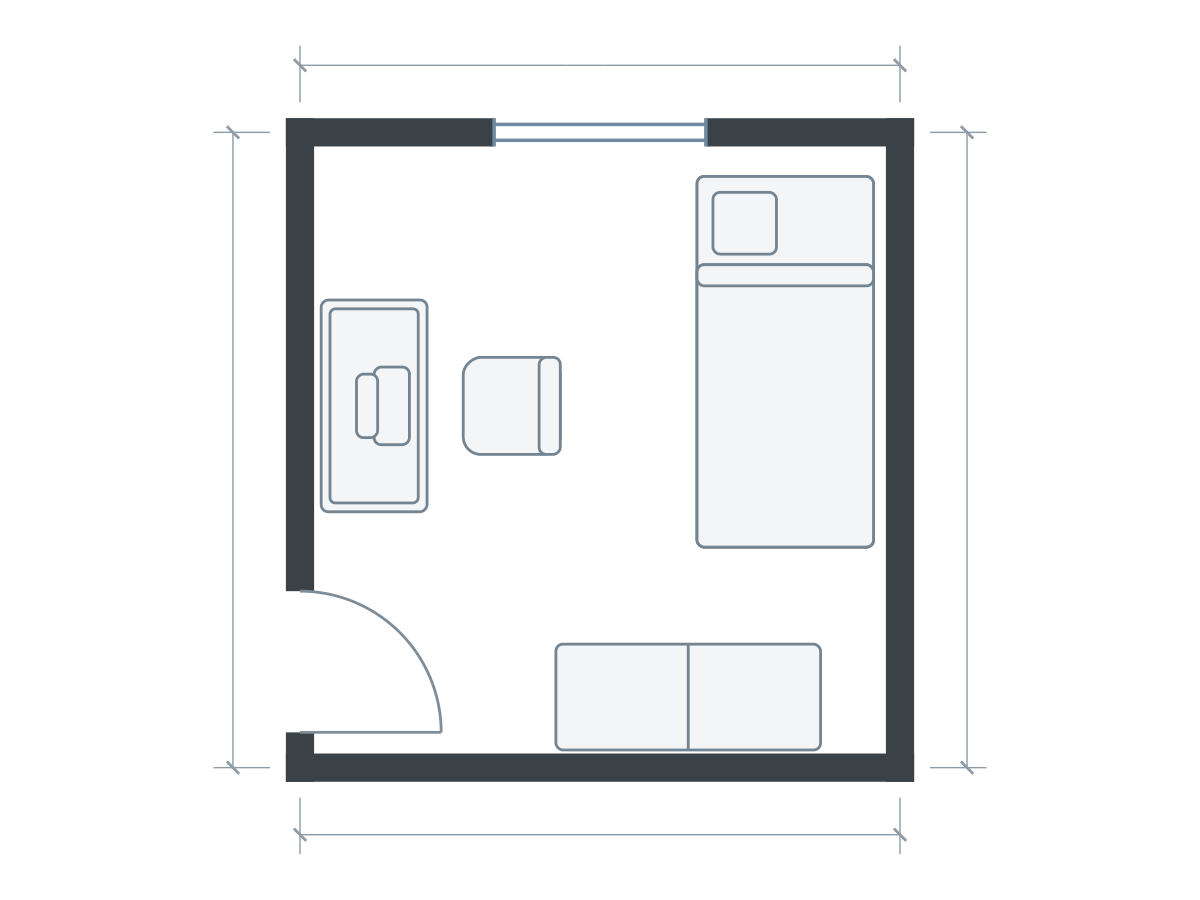
Furniture sizes in this drawing
| Piece | Meters | Feet |
|---|---|---|
| Single bed | 1.00 × 2.10 | 3.28 × 6.89 |
| Desk | 1.20 × 0.60 | 3.94 × 1.97 |
| Office chair | 0.55 × 0.55 | 1.80 × 1.80 |
| Wardrobe | 1.50 × 0.60 | 4.92 × 1.97 |
Furniture sizes in this drawing
| Piece | Meters | Feet |
|---|---|---|
| Single bed | 1.00 × 2.10 | 3.28 × 6.89 |
| Desk | 1.20 × 0.60 | 3.94 × 1.97 |
| Office chair | 0.55 × 0.55 | 1.80 × 1.80 |
| Wardrobe | 1.50 × 0.60 | 4.92 × 1.97 |
Furniture sizes in this drawing
| Piece | Meters | Feet |
|---|---|---|
| Single bed | 1.00 × 2.10 | 3.28 × 6.89 |
| Desk | 1.20 × 0.60 | 3.94 × 1.97 |
| Office chair | 0.55 × 0.55 | 1.80 × 1.80 |
| Wardrobe | 1.50 × 0.60 | 4.92 × 1.97 |
The alternatives use the same room outline and drawing scale. Open each to inspect and save an independent editable copy. Illustrations show footprints; drawer travel, vertical clearances and continuous walking routes need separate checks.
One inventory for all three tests
Each arrangement contains a 1.00 × 2.10 m bed (3.28 × 6.89 ft), a 1.20 × 0.60 m desk (3.94 × 1.97 ft), a 1.50 × 0.60 m wardrobe (4.92 × 1.97 ft), and a 0.55 × 0.55 m chair (1.80 × 1.80 ft). These are illustrative external footprints. Rotating a piece changes its direction, not its dimensions.
The chair rectangle shows one position, not the complete area needed to approach, sit, turn and stand. Draw another chair position or use temporary floor markings to test movement. Do the same with storage doors and drawers. A spacious-looking diagram is insufficient evidence that both activities can happen together.
Arrangement A: bed on the right, desk on the left
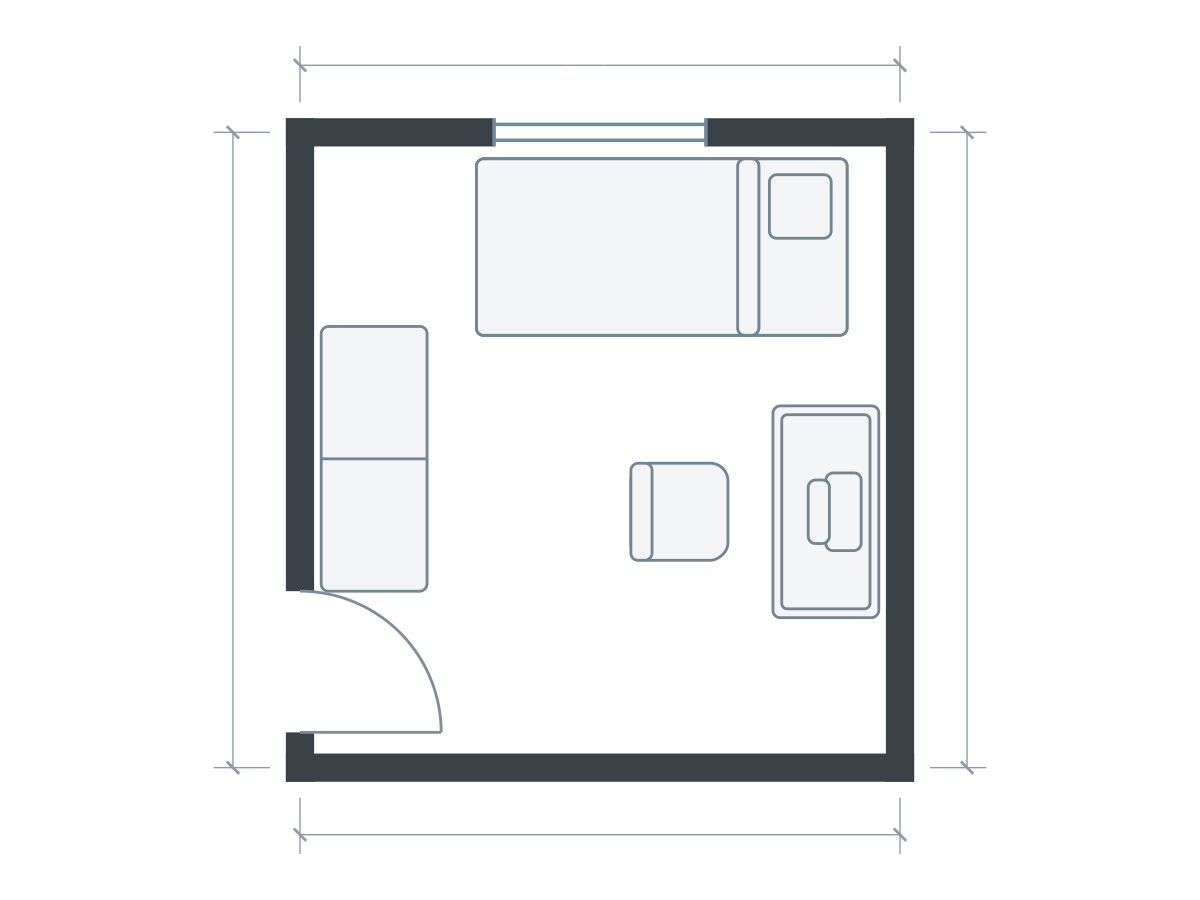
Place the bed lengthwise along the right wall, desk facing the left wall above the entry, and wardrobe across the lower-right wall. This separates work and sleep across the room. A person using the desk faces away from the bed, while the middle remains available for changing direction.
The cost is that the chair projects toward the bed. Check the nearest gap from the chair in its working position to the bed’s outer edge, then move it back to stand up. Open the wardrobe while someone uses the desk. This option is worth testing when the desk is used daily and the entry leaves enough uninterrupted side wall.
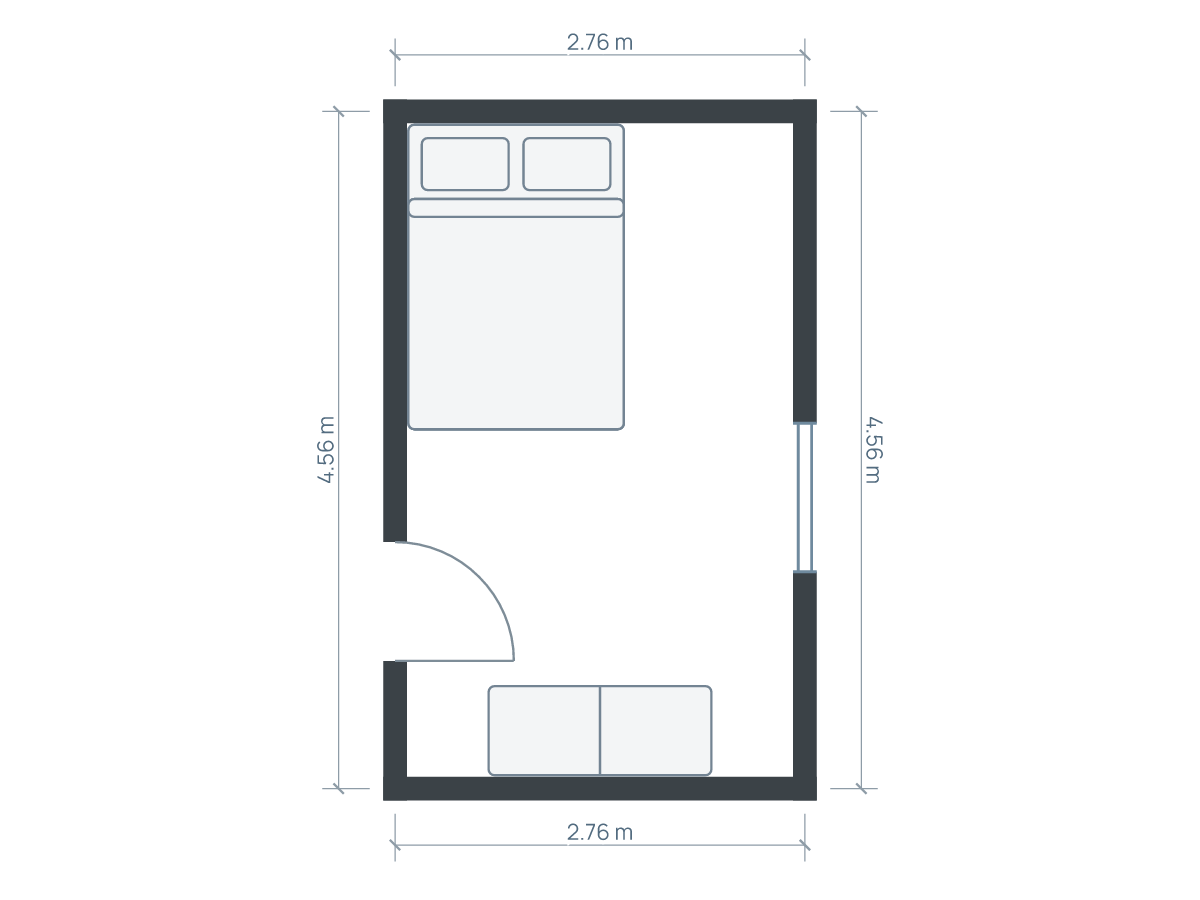
Arrangement B: bed across the top, desk on the right
Rotate the bed 90 degrees across the top end. Put the desk facing the right wall and turn the wardrobe along the left wall above the entrance. The work area now sits beside the open lower portion rather than directly opposite a long bed edge. The bed uses much of the far wall, which changes access to the window.
This can create a more distinct work corner, but the top-wall window needs careful inspection: check sill height, opening direction, curtains and any radiator. Do not infer vertical clearance from a top-down drawing. Check the turn around the desk chair when entering; also test making the bed from the accessible side.
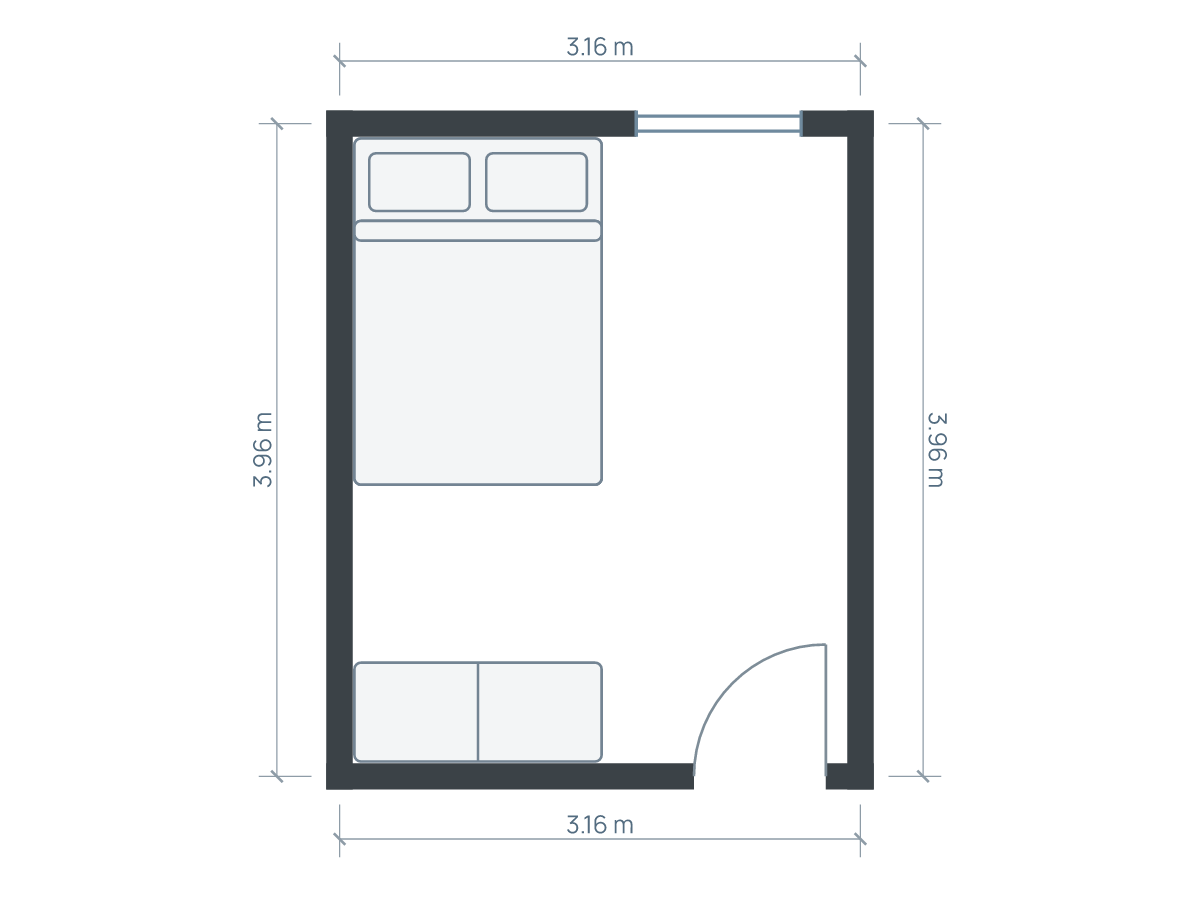
Arrangement C: bed on the left, desk at the lower end
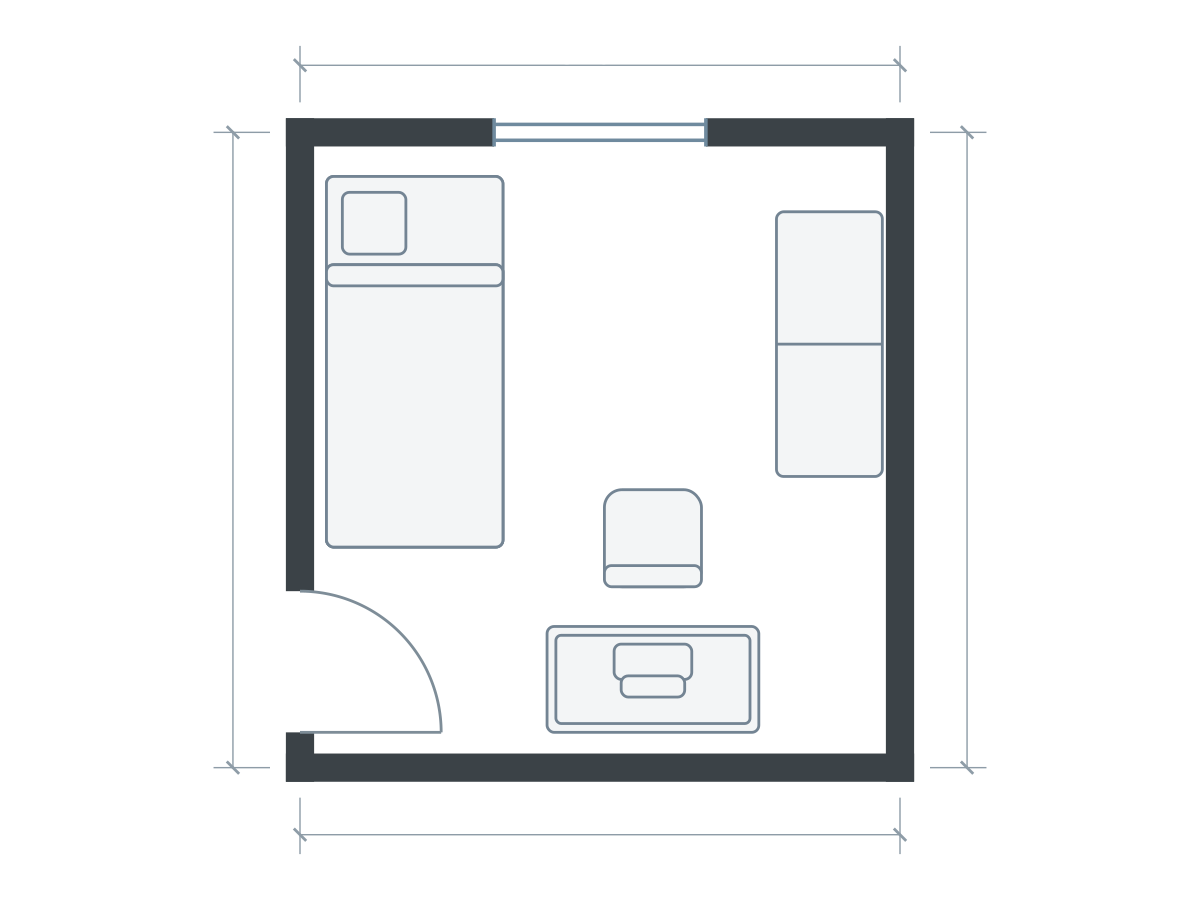
Move the bed lengthwise to the left wall above the entry. Put the desk across the lower-right wall and turn the wardrobe along the upper-right wall. Work and clothing storage now occupy different ends of the right side.
The desk can face a quieter wall, but the occupied chair sits in the transition between entry and storage. Test the room with the chair pulled back and the wardrobe open simultaneously. If that blocks the route you need, compare moving the desk rather than immediately reducing the bed. This arrangement is useful when the entry and window prevent an opposite-wall desk.
Choose by real use and daylight
Do not choose the desk position only because it faces the window. OSHA’s workstation guidance recommends orienting displays at right angles to windows to reduce glare. Test the actual screen at the time of day you normally work; blinds and equipment position affect the result.
- Replace the assumed door and window positions first.
- Use full bed-frame dimensions and the real desk equipment.
- Test chair movement and wardrobe use together.
- Check power leads without crossing the entry route.
- Keep the same zoom and inventory when comparing.
For a separate measured starting point, try the existing bedroom-and-desk study. Save your preferred plan and an alternate, then use Compare saved layouts. The fit checker can flag footprint conflicts, but it does not verify every walking route or vertical obstruction.
Sources and editorial approach
Published by Planlilt. Worked dimensions and layout choices are illustrative assumptions unless a source is identified beside a claim. Feet use 1 ft = 0.3048 m and are rounded decimal equivalents. No search-volume estimates or professional certification are implied.
- OSHA computer workstation environment — Orienting a display at right angles to windows can reduce reflected glare; daylight alone does not determine desk position.
Original Planlilt geometry; illustrative 2D plan, not a photograph or 3D render.