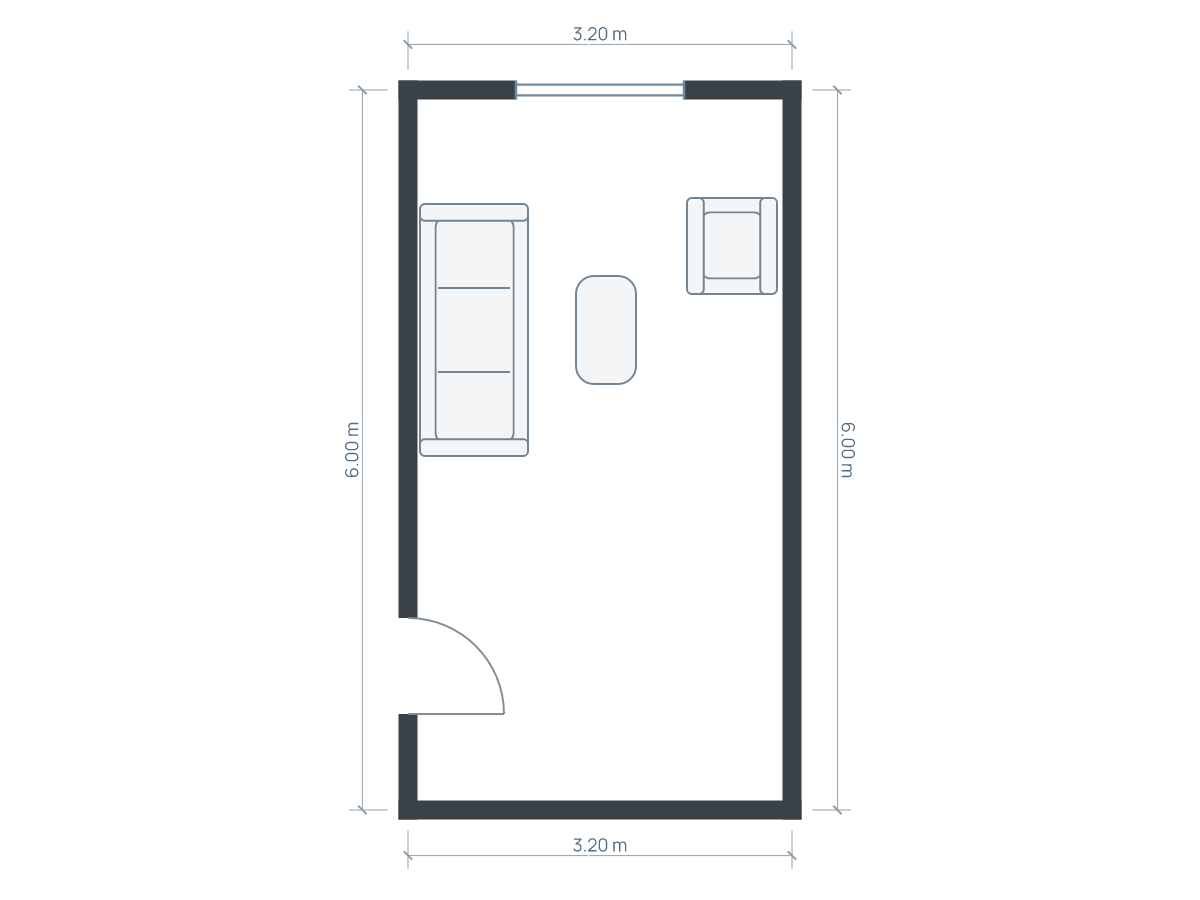
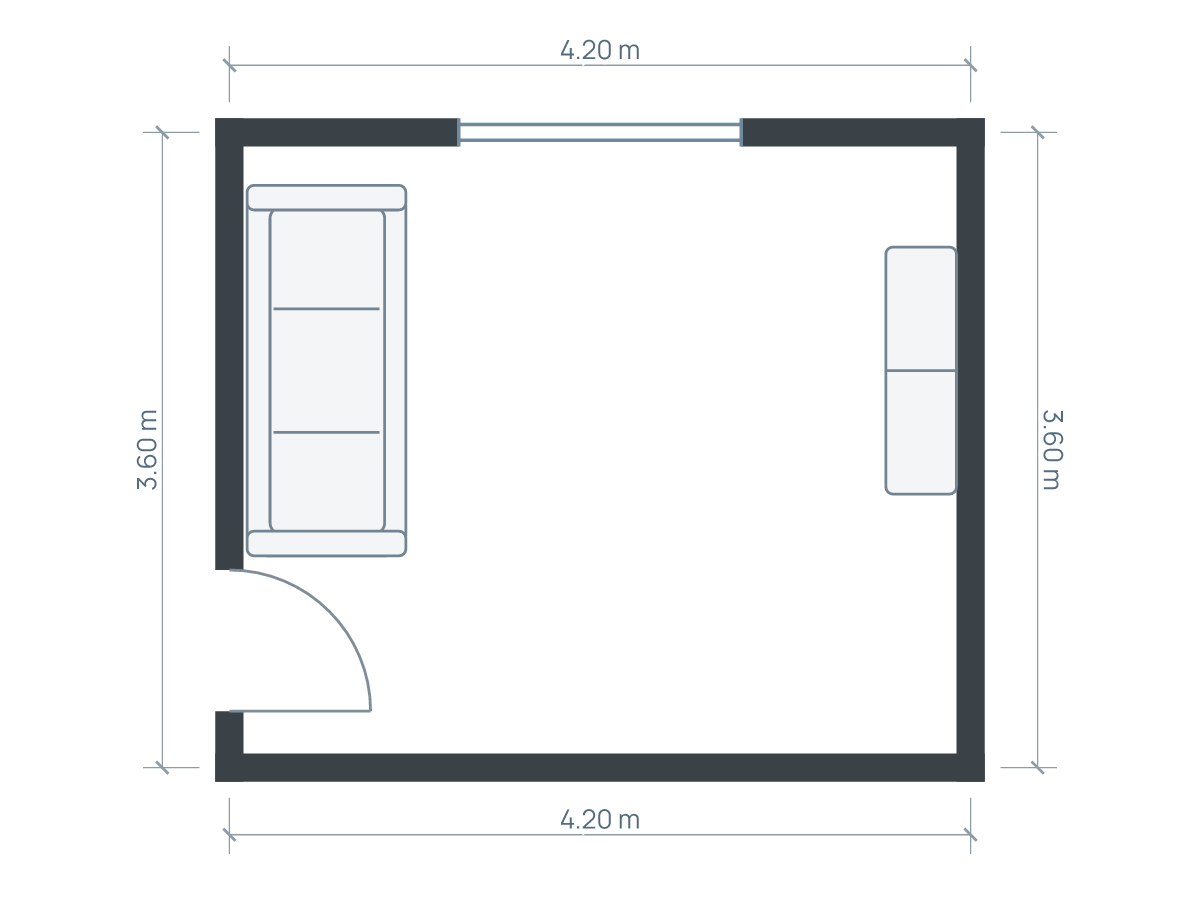
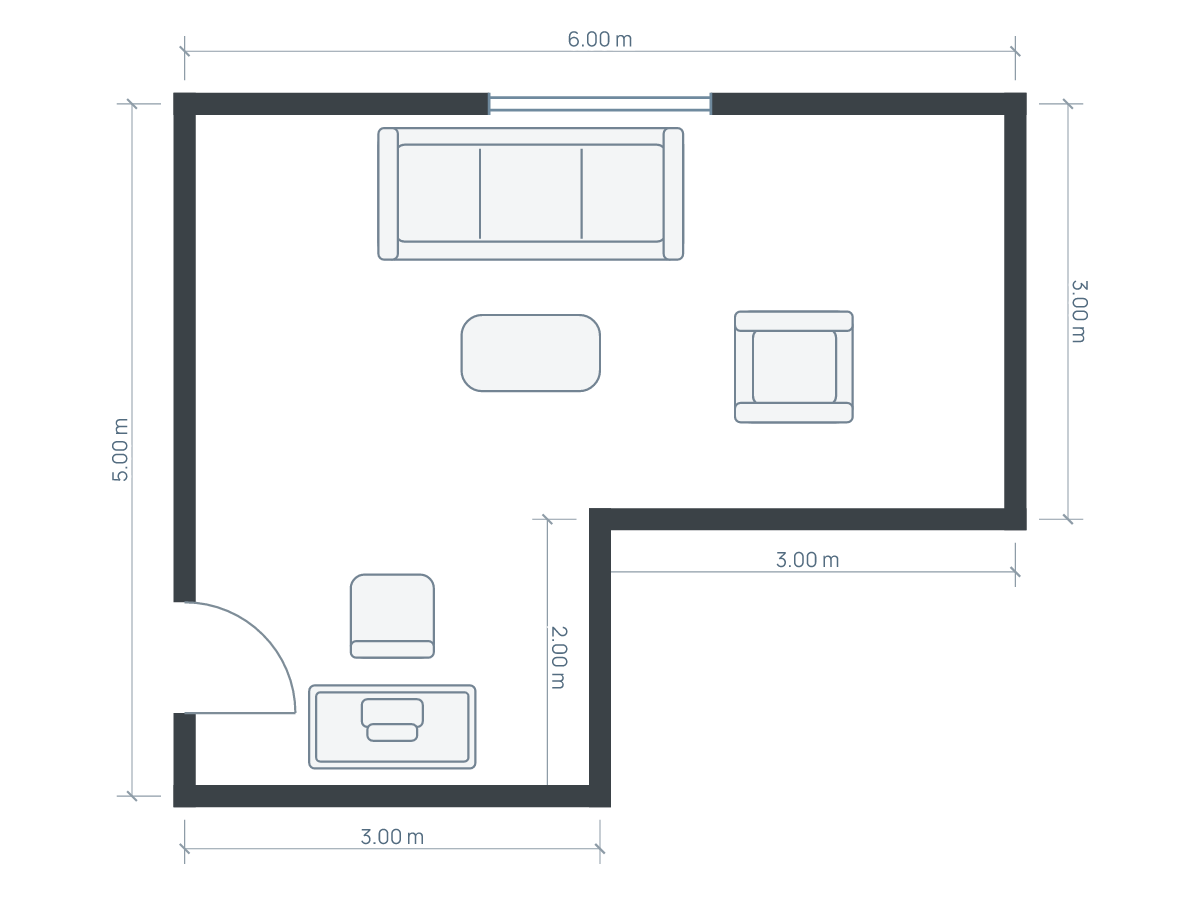
Plan the connections before the sofa
In a living room with several doorways, mark the most-used connections first and place the seating beside them. A clear wall is not automatically the best sofa wall if the sofa then forces everyone through the coffee-table gap. You may need an offset or floating group, a smaller furniture set, or both.
POVISON's pass-through planning guide starts with openings and daily traffic rather than the longest wall. The examples here turn that principle into a measured exercise: decide which routes are essential, then test them with the furniture in use.
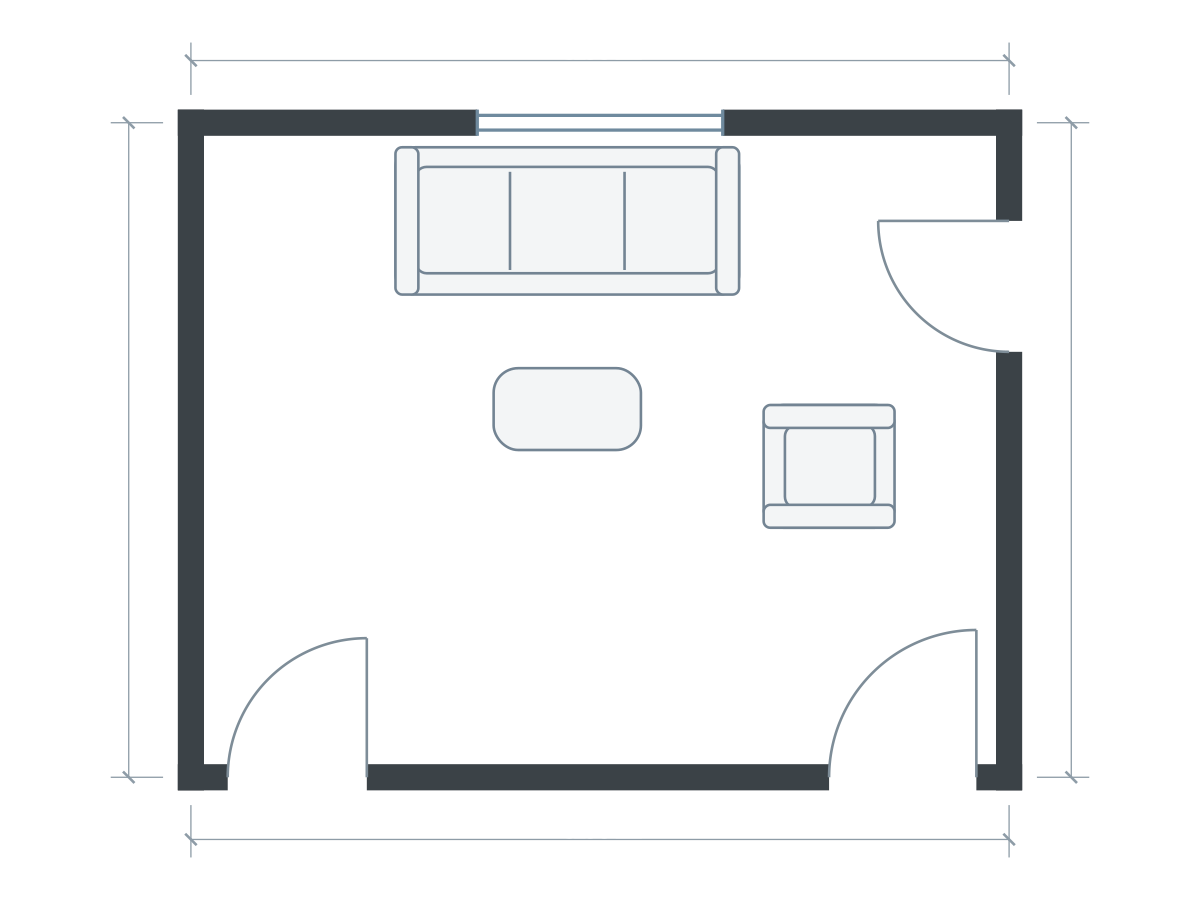
Furniture sizes in this drawing
| Piece | Meters | Feet |
|---|---|---|
| Sofa | 2.10 × 0.90 | 6.89 × 2.95 |
| Coffee table | 0.90 × 0.50 | 2.95 × 1.64 |
| Armchair | 0.75 × 0.80 | 2.46 × 2.62 |
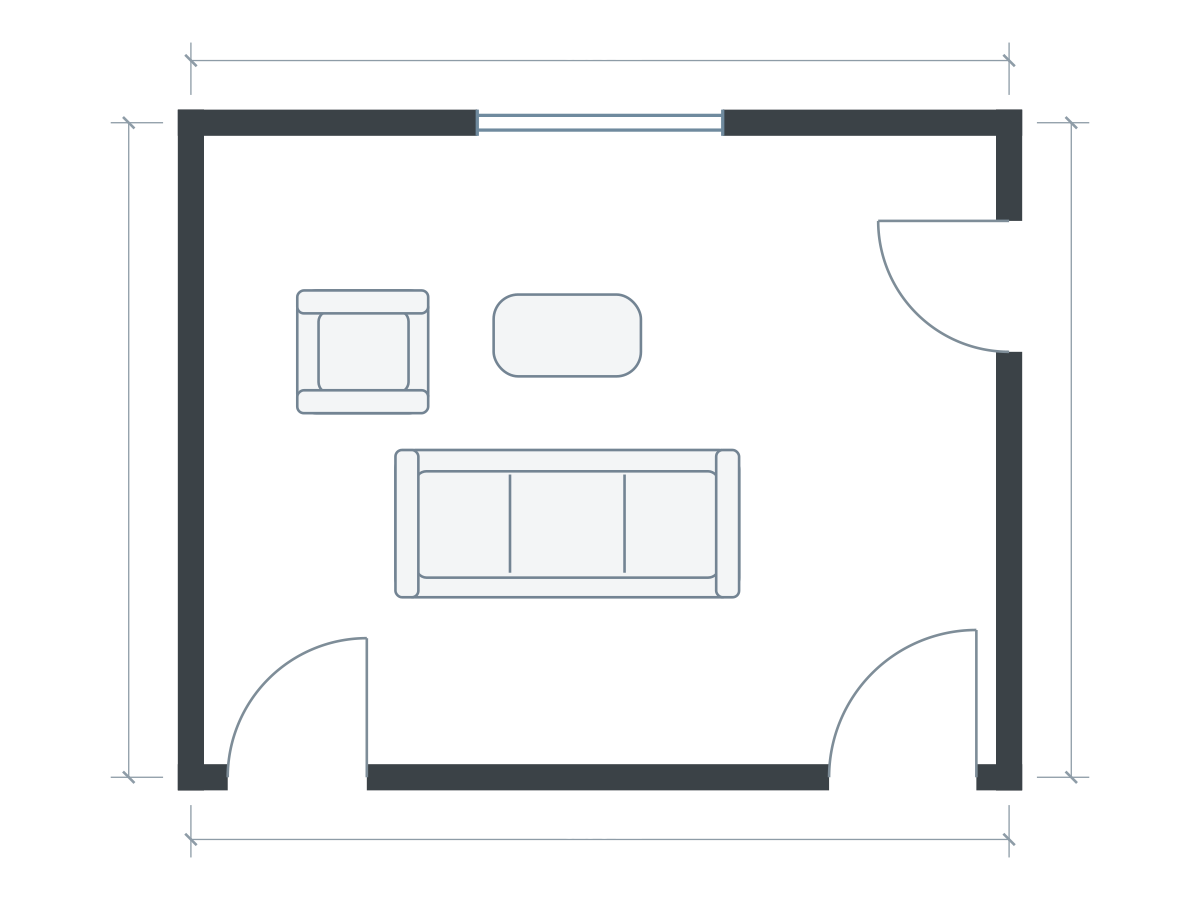
Furniture sizes in this drawing
| Piece | Meters | Feet |
|---|---|---|
| Sofa | 2.10 × 0.90 | 6.89 × 2.95 |
| Coffee table | 0.90 × 0.50 | 2.95 × 1.64 |
| Armchair | 0.75 × 0.80 | 2.46 × 2.62 |
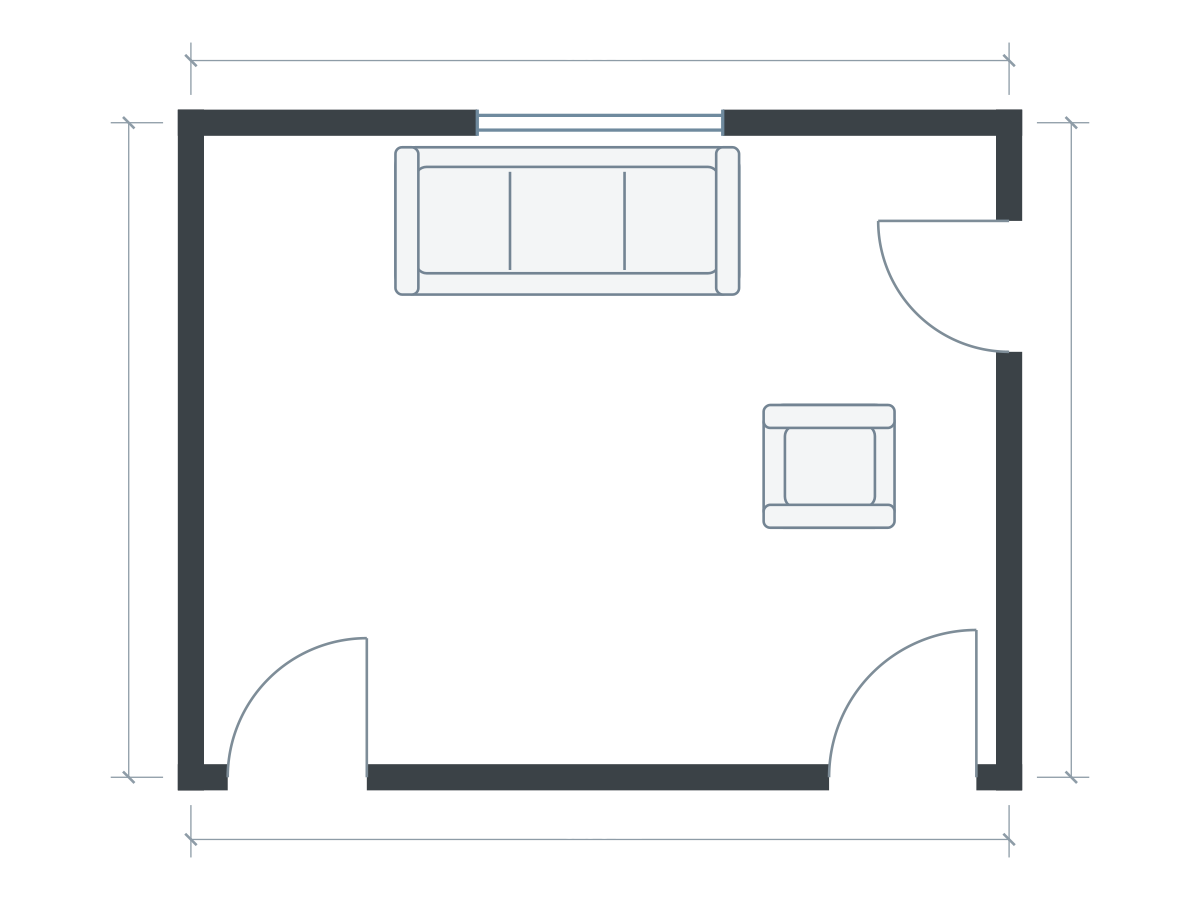
Furniture sizes in this drawing
| Piece | Meters | Feet |
|---|---|---|
| Sofa | 2.10 × 0.90 | 6.89 × 2.95 |
| Armchair | 0.75 × 0.80 | 2.46 × 2.62 |
The alternatives use the same room outline and drawing scale. Open each to inspect and save an independent editable copy. Illustrations show footprints; drawer travel, vertical clearances and continuous walking routes need separate checks.
Make a doorway and route map
Draw every opening and label what it serves: hall, kitchen, balcony, bedroom or cupboard. Add each hinged door's width, hinge side and swing. An opening without a hinged door still needs a usable approach.
Next list the journeys that happen in ordinary use. Hall to kitchen may be frequent; cupboard access may be occasional but still necessary. Do not remove a route merely because that door is used less often. Identify which journeys can pass around the same edge of a seating group and which need a separate connection.
A door-swing sector and a walking route answer different questions. The sector shows where the leaf moves. The route is where a person travels after passing the leaf, potentially carrying something or turning. Both need checking.
A 5 × 4 m example with three openings
Assume a room 5 × 4 m (16.40 × 13.12 ft), with a hall door near the southwest corner, a kitchen opening near the southeast corner and a balcony door on the east wall farther north. Use an illustrative 2.1 × 0.9 m sofa (6.89 × 2.95 ft), a 0.9 × 0.5 m coffee table (2.95 × 1.64 ft), and a 0.75 × 0.8 m chair (2.46 × 2.62 ft).
For the first trial, reserve a 0.9 m-wide strip along the south side for the hall-to-kitchen route and keep its turn toward the balcony clear. The target strip is 2.95 ft wide; it is an illustrative planning allowance, not a regulation or accessibility certification. Whether it works depends on occupants, door positions, passing and what is carried.
The remaining nominal room depth is 3.1 m. Across it, a 0.9 m sofa, 0.4 m trial gap, 0.5 m table, another 0.4 m trial gap and 0.8 m chair depth total 3 m. Only 0.1 m remains in this simple stack. That is a warning that the chair cannot be added casually opposite the sofa; shift it beside the group or remove the central table and retest.
Compare three practical responses
Offset the group. Keep the furniture on the quieter side and let the busiest connection pass along the other. This can preserve a familiar sofa-to-TV arrangement, though the group may no longer be centered in the room.
Float the sofa. Use its back to define the edge of seating. Measure the path behind it before adding a console or floor lamp. Floating does not mean leaving a narrow, unusable strip between the sofa and wall.
Use fewer pieces. A sofa, one flexible chair and side tables may work better than the same sofa, two chairs and a central table. This sacrifices some seating or table area while making the everyday route easier. Test the actual household's needs rather than treating a furniture count as a design requirement.
Check the room at its busiest moment
Put the balcony door open, someone in the chair and the storage drawer extended in your mental test. A room that works only when every item is tucked away is not showing its daily footprint. Also consider cables and lamps: a floating seat can leave a power lead crossing the very route you meant to protect.
Common mistakes include using the door leaf's width as the passage measurement, placing an armchair in the inside of a turn, hiding a rarely used door behind a unit, and judging all routes from one overhead screenshot. Walk through from each opening in the real room.
- Can each door reach its intended open position?
- Can someone approach and operate it?
- Does a pulled-back chair narrow a junction?
- Does the most-used journey interrupt screen viewing or conversation?
- Would removing one table solve more than shrinking every gap?
Use the planner for the footprint, then verify the route
Open a living-room starting plan, replace its door and window positions and add your other openings before moving furniture. Save one arrangement with the group on the wall and an alternate with the sofa floating. Compare the drawings at the same scale.
Use Fit check to review illustrated door swings, furniture overlaps and wall conflicts. It does not calculate every continuous route, turning maneuver or accessibility requirement. Use the furniture movement guide alongside a physical walk-through, and seek location-specific professional advice where requirements matter.
Sources and editorial approach
Published by Planlilt. Worked dimensions and layout choices are illustrative assumptions unless a source is identified beside a claim. Feet use 1 ft = 0.3048 m and are rounded decimal equivalents. No search-volume estimates or professional certification are implied.
- POVISON: pass-through living-room layout — A pass-through layout should map openings and daily routes before placing seating; circulation patterns differ from room shape.
Original Planlilt geometry; illustrative 2D plan, not a photograph or 3D render.